Cautionary Tales of Power
Posted: November 27, 2015 Filed under: Coding, Creations, DIY, Explorations, Getting A Clue, How-to, Pearls of Folksy Wisdom, So that didn't work | Tags: arduino, blinky, DIY, fastled, fire, glow, glowy, LED, LEDs, light, power 3 CommentsWhen doing an LED electronics project, there seem to be three big “P”s that have to be tackled:
1. Pixels (which ones, how many, what configuration?),
2. Programming (what do I want, and how can I do that?), and
3. Power (how much, from where, and how do I distribute it?)
And people (by which I mean: perpetual newbies like me) tend to do them in that order: first wire up some pixels, then program them, then figure out how to power it all for real.
And of course, this often leads to a problem where you get stuck between steps 2 and 3, where you have your creation sort of up and running on the lab bench — but now there’s this little problem of how to power it, and you have to go back and rethink and rework other parts of the project to accommodate the power situation. So it’s worth planning for power from the start — which is easy to say, but hard to do!
What could possibly go wrong? (A list)
So what happens if you don’t plan for power? Well, here are some power problems that I have personally had. How many of these can you diagnose just from the description? (“Failure to plan” is a nice catch-all phrase here if you get stuck.)
- Hrm, now how do I get power all the way up there?
- Gee, that’s a long run of wire… but if I use fat wire, it’ll be expensive and heavy and cumbersome. Nah…
- I’ll use skinny wire, it’s much cheaper… Hey, why is it only reading 4v at the far end? And does anyone smell something burning?
- OK, I switched to thicker wire, and I’ll just re-use the power connectors from before. Holy cow now the connectors are getting hot!
- Fine, I’ll switch to these big thick nonpolarized connectors. Huh, that’s odd, it’s not working now. Does anyone smell something burning?
- For this other wearable project, I’ll use a simple battery holder and regular alkaline batteries… hey… why are the colors so ‘warm’.. no blue? And now no green, too…
- OK, switching power to one of those ’emergency phone chargers’ that takes AAs and puts out 5v from a USB socket. Hey! Why are the batteries dying so fast?
- OK, fine, I’ll switch to this lithium battery pack… hey, it said 5000mAh… so why did it stop powering my 5000ma project after only half an hour?
- How come my WS2811 project works fine from my computer, but then flickers like crazy when I power it from this cheap USB wall power adapter?
- For this big outdoor project, I’ll use this big, burly 12V lead-acid marine battery. Hey… how come it won’t hold a full charge after the first time I let the lights go all night?
- Everything was working fine yesterday, before last night’s rain!
- Everything was working fine yesterday in the cold and snow, so it should be working fine today now that it’s warming up, right?!
- I think I’m going to switch microcontrollers. The old one had a power regulator that could handle 12v input. Hey… do you smell something burning?
- Why is this power switch getting hot now? And why is it now totally stuck in the “on” position? And … do you smell something burning… again?
So: Plan For Power.
The lesson to learn here is that for basically any real project, calculate and plan the power first. Before you wire up any pixels. Before you write any code. Just stop for a minute and think about how much power you’re going to need, and where it has to come from, and where it has to go.
Use on-line calculators that will help you figure out how much power you’re going to need, and what gauge wire you’ll have to use given how long your cable runs are going to be. I also really like the “LEDstimator” app for iOS to help explore some “what-if” values for things like wire gauge. https://itunes.apple.com/us/app/ledstimator/id945794010?mt=8
And above all else… uh… wait… do you smell something burning?
Running 2 Amps of LEDs through an Arduino Nano
Posted: February 25, 2014 Filed under: Coding, DIY, How-to, That Totally Worked | Tags: amps, arduino, blinky, fastled, hack, hacks, LED, LEDs, nano, power, USB 2 CommentsThe Arduino Nano provides up to 0.5 Amps of regulated +5v output, on it’s “+5V” pin, which can drive between 10-30 addressable LEDs, depending on your chosen brightness and animation patterns. Even if you connect a 2 Amp USB power supply (e.g. an iPad charger), the Nano’s little voltage regulator will overheat if you try to draw more than 0.5 Amps from the “+5V” pin on the Arduino.
However, you can ‘tap’ the pre-voltage-regulator power traces on the Nano’s circuit board, and drive 2 Amps of LEDs (over 100) ‘through’ the Nano, and do it in a way that keeps your wiring simple. Basically, you can find the places on the Nano’s board where the raw USB power connections are exposed, and tap into them there.
WARNING!
MODIFY, MISUSE, AND DESTROY YOUR ARDUINO AT YOUR OWN RISK!
DANGER! FIRE! RUN!
But, OK, if you wish to continue…
1. Flip the Nano over so you’re looking at the bottom side.

2. The unfiltered, unregulated +5 signal from the USB port is available on the board near the base of the D2 pin. Carefully solder a wire (red, for +5v) directly to the exposed component pin on the circuit board.
3. A convenient companion GND connection can found on the center pin of the power regulator itself. Solder a wire (black, for ground) to this pin.
4. By powering your LEDs from these direct-power traces (and thus directly from the USB power source), instead of through the Nano’s half-amp-max voltage regulator, you can drive up to about two Amps worth of LEDs, provided that you plug the Nano into a 2 Amp USB power adapter.
I’ve used this technique in probably six or eight Arduino Nano projects, and nothing’s caught fire (yet). With a little probing around, you can also find similar ‘hacks’ for other models of Arduino, e.g., the Uno, Leonardo, etc., but since power is handled differently on each board, you’ll have to figure it out differently for each board design.
Good luck!
Boost your air conditioner’s cooling power by blocking “heat leaks”
Posted: July 15, 2012 Filed under: How-to | Tags: AC, air conditioner, air conditioning, BTU, BTUs, cooling, heat, power, summer, Watts 4 CommentsA basic “5,000 BTU” air conditioner can pump about 1,500 Watts of heat out of a room every hour. To get more bang for your A/C buck, find the big ‘heat leaks’ in your room — and block them.
Your air conditioner is a pump, and what it pumps is an invisible liquid called ‘heat’. (OK, not really, but this is a useful way to think about it.) Your A/C unit scoops up the ‘heat liquid’ from inside the room, pumps it out through the window, and dumps it outside. As the ‘heat liquid’ is slowly drained out of your room, the room gets cooler, you get happier, and civilized indoor life can continue.
To boost the cooling power of your A/C unit, find out what’s letting heat leak into your room, and you block the leaks. If your room is constantly filling up with ‘heat liquid’, the pump (A/C) spends a lot more energy just keeping up with the leaks, and less energy dropping the temperature for you. Luckily, there are (at least!) three easy things you can do:
- Block the daytime sunlight. Sun flooding in through the windows also brings a flood of heat into the room. Close the blinds, pull the drapes. Congratulations, you’ve just closed a big, gaping hole that was pouring heat in to the room.
- Turn off every light you can — and replace others with LED or CFL bulbs. If you’re running three 60-Watt lightbulbs in the same room as a basic 5,000 BTU window A/C unit, you’re using 12% of your A/C’s cooling power just to pump out the heat that the lightbulbs are bringing in! Turn off the ones you don’t need, and replace the others with modern high-efficiency LED or CFL bulbs. Good job: you’ve just blocked another source of heat sneaking in.
- Unplug those electronic gizmos — or at least move the chargers to another room. Nearly everything plugged into a wall socket is leaking heat into your room. Put your hand on each ‘wall wart’ transformer, and if any of them feel warm, you’ve found another leak through which heat is sneaking into your room! When you unplug the gizmo, you plug another heat leak.
It’s common to find 20% or more of an A/C unit’s cooling power being used up needlessly, pumping out heat that you can easily block before it gets in. Block that heat before it gets in, and presto: 20% boost in A/C cooling power.
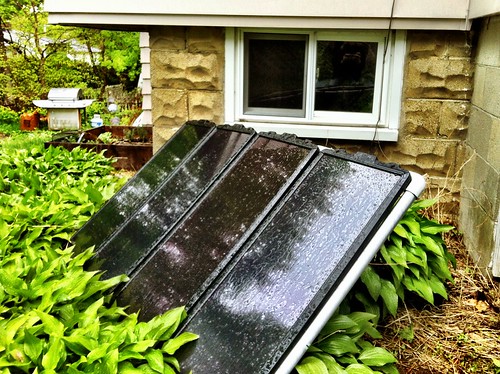
Small Scale Solar power presentation
Posted: May 1, 2012 Filed under: DIY, Explorations, That Totally Worked | Tags: 12V, blinky, DIY, electricity, glow, glowy, light, off-grid, power, repair, solar, solar cell, solar cells, solar panel, solar panels 1 CommentI gave a “learning lunch” presentation on Small Scale Solar power today. We had a great audience, got great questions, and had fun doing it — despite the definite lack of sunshine to play with today.
The Short Version is this:
- Hook a solar panel to a charge controller to a battery. (There are starter kits with everything.)
- Presto: 12 Volt DC power!
- Use your newfound power as-is, or step down to 5v USB, or up to 120VAC using an inverter.
The slides don’t tell the whole story by themselves; that requires my own personal song and dance routine. Nevertheless, here they are, with “lite” graphics for fast download: PDF.
